Shower Seals: A Quick Guide for Replacement and Maintenance
Understanding Shower Seals
There are several types of shower seals available, including translucent PVC and magnetic strips. These seals are designed to prevent water from leaking between the glass. Over time, however, they lose their ability to block water and absorb the impact of opening and closing the door. Eventually, they must be replaced. If you’re unsure how to replace yours, read on!
Step 1: Measure Your Shower Glass Thickness
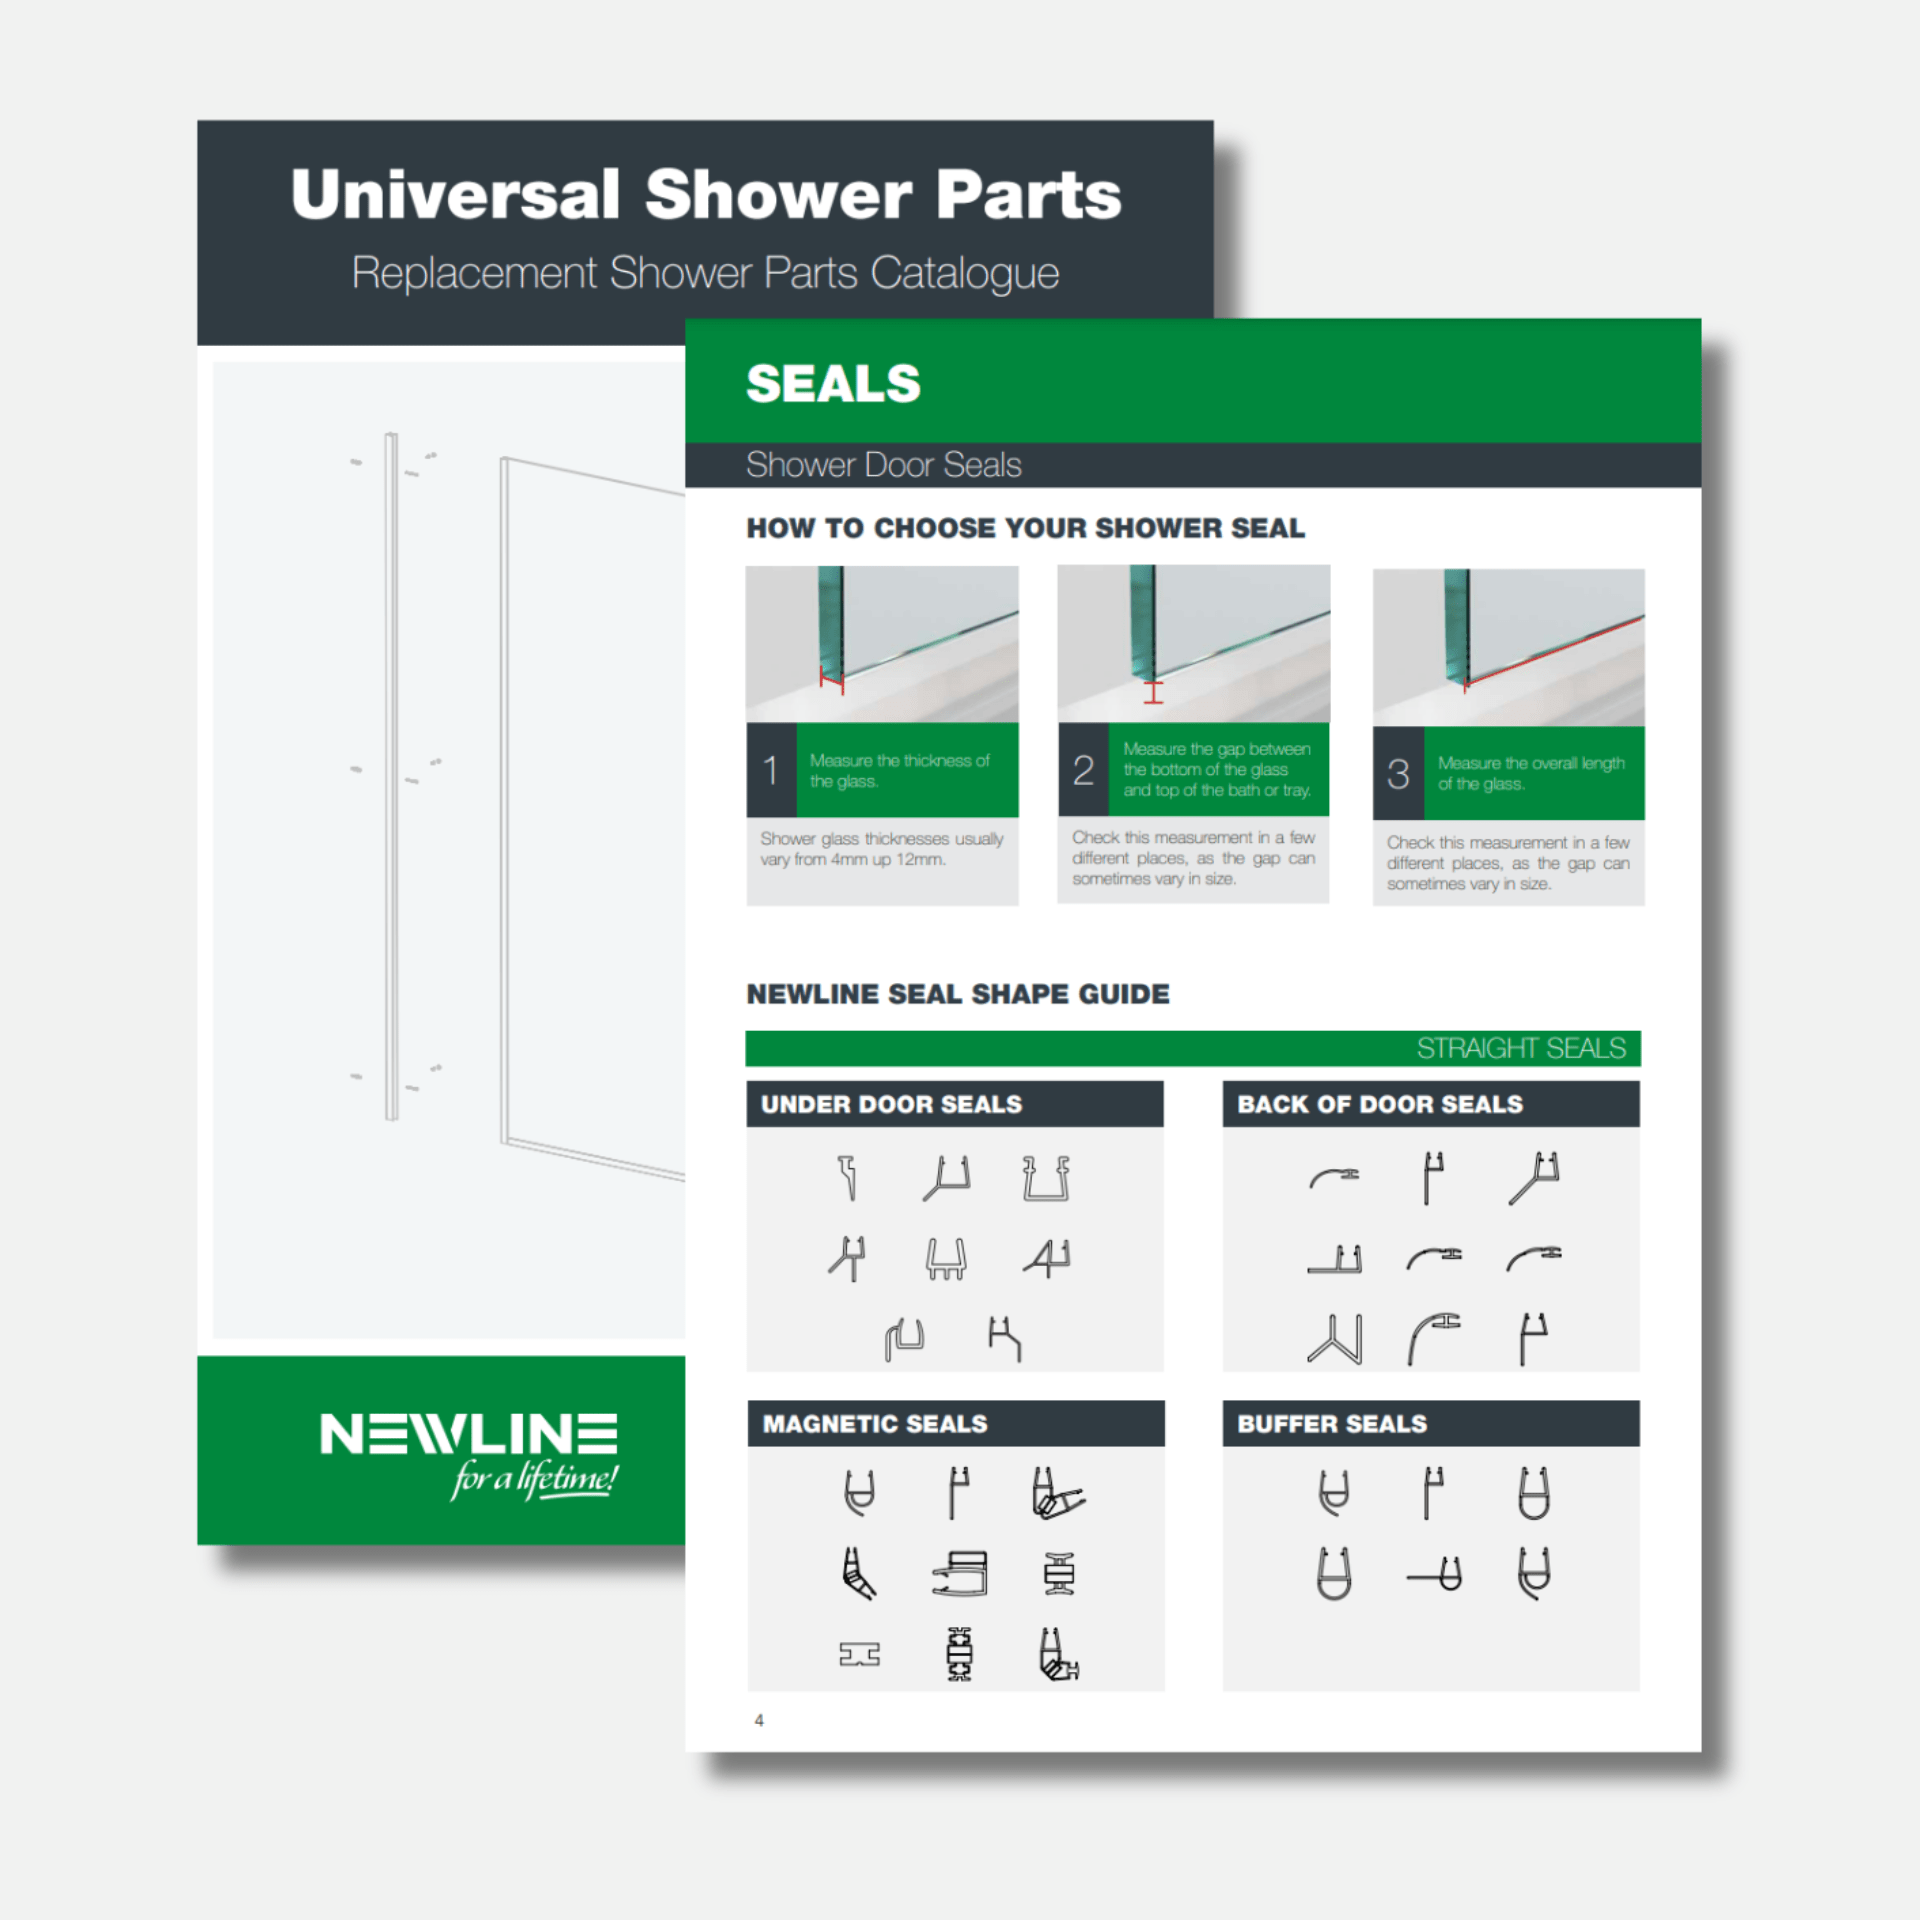
Start by measuring the thickness of your shower glass. This step is crucial for finding the right seal. For instance, if your glass is 6mm thick, an 8mm seal will be too loose. To avoid this, ensure you match the seal thickness to your glass size. The most common thicknesses in New Zealand are 6mm, 8mm, and 10mm. You can measure your glass thickness with tape measure or ruler.
Step 2: Measure the Length of Your Shower Door Glass
Next, measure the length of your shower door glass. This will help you determine how long the seal should be. If your glass is curved, use a soft metric tape measure. We recommend adding a little extra to your measurement. You can always cut off any excess but cannot make the seal longer.
Step 3: Check what Type of Shower Seal
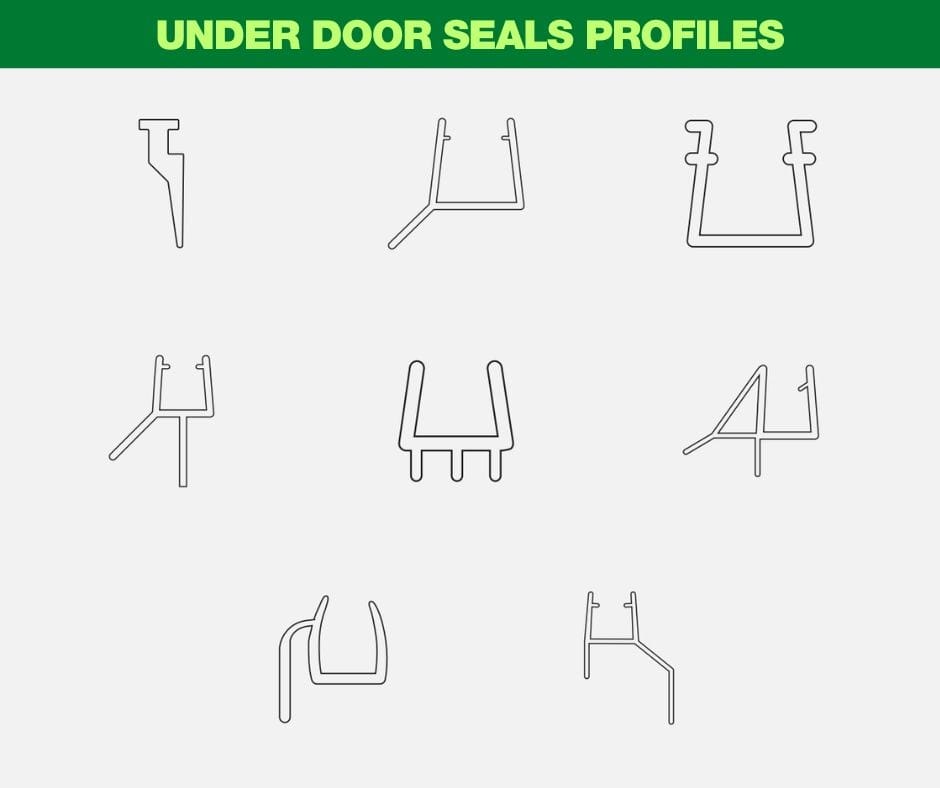
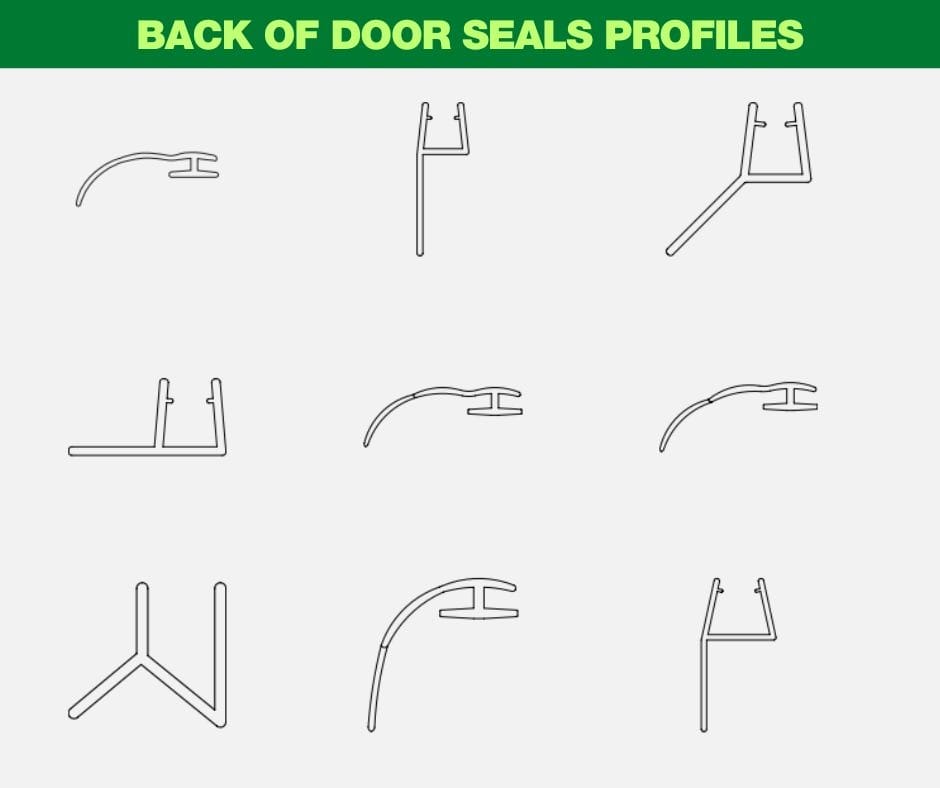
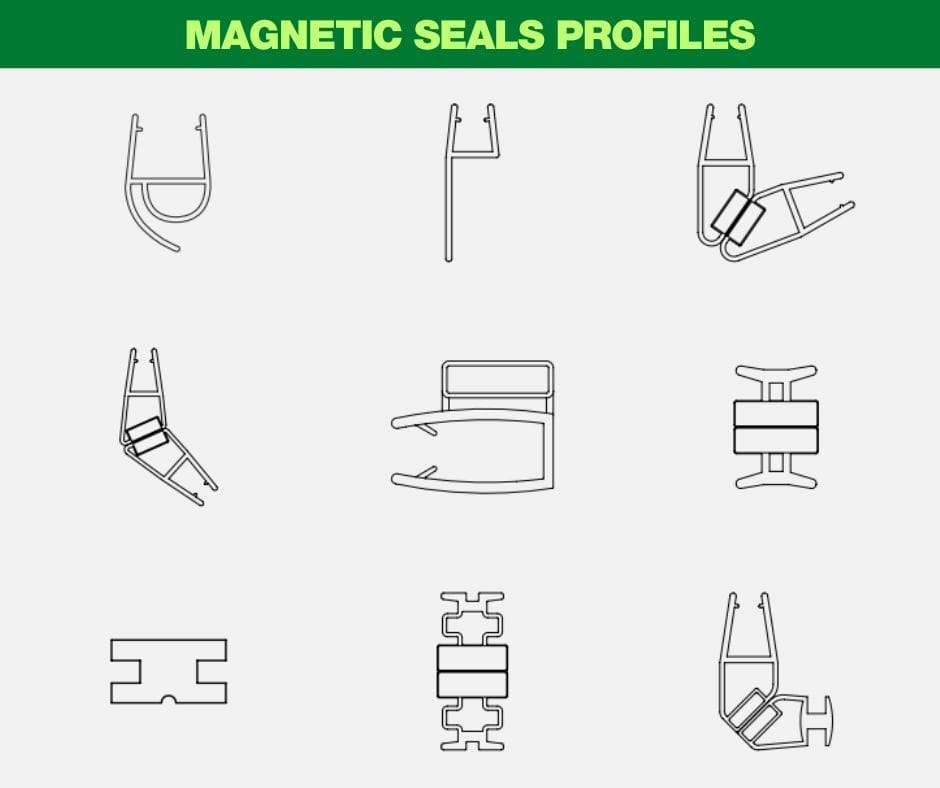
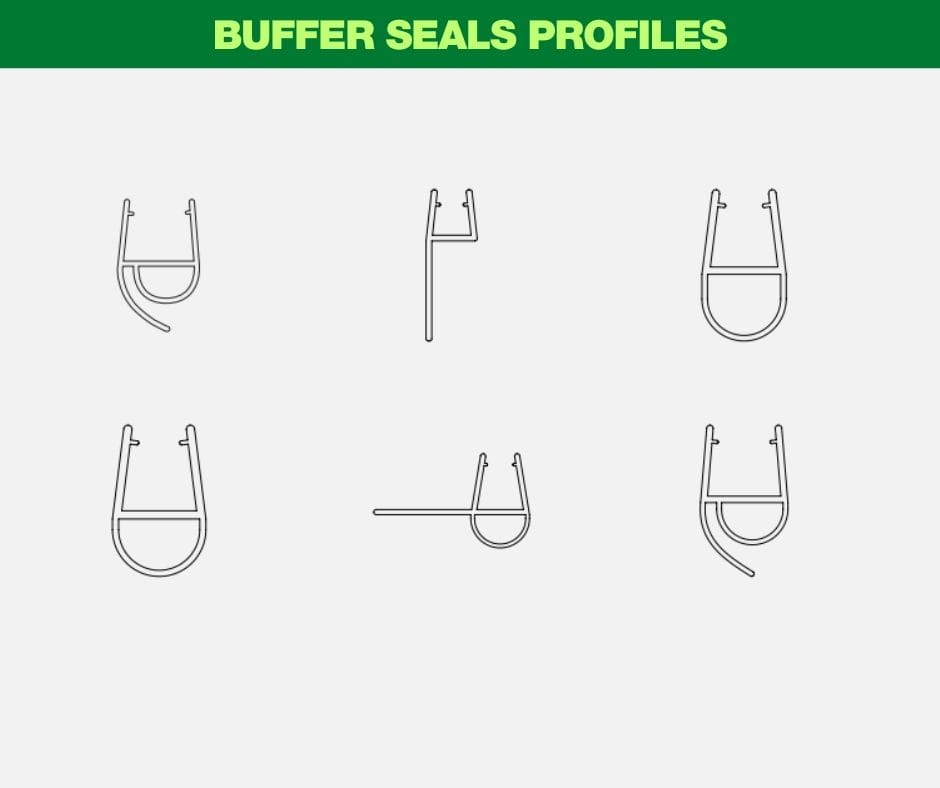
These are the most common types of shower seals:
Under Door Seals
Back of Door Seals
Magnetic Seals
Buffer Seals
Magnetic seals are typically made from translucent PVC and have a magnetic strip. This ensures a tight, waterproof connection. Magnetic seals are ideal for curved , pivot and neo door showers. You can also learn more about each of the seals profiles below:
Step 4: Remove Old Seal and Clean the Area
Shower seals should be replaced every 2 years, or sooner if damaged, cracked, or brittle. To begin, gently pull out the old seal with your hands. After removing it, clean the glass where the seal was placed. Dry the area thoroughly to prepare for the new seal.
Step 5: Install Your Shower Door Seal
Now, check that your new seal fits correctly. Measure it and cut the bottom to the right length. Place the seal on the door and mark where you want to cut it. Depending on the seal’s type, you may be able to use scissors or need a craft knife. After cutting, smooth any rough edges and remove debris. Then, slide the new seal onto the door.
Step 6: Care and Maintenance of Your Shower Door Seal
Regular cleaning is essential to extend the lifespan of your shower door seal. Over time, gunk, mould, and mildew can build up. We recommend cleaning the seal once a week with warm water, soap, and a toothbrush to reach all corners. Always follow the manufacturer’s instructions for proper care.
If you need a replacement for your Newline Shower seal, check our spare parts range. If you have a different shower, explore our Universal Parts Catalogue for seals that fit most models.
If you’re still having issues with your shower seal, give our team a call on 0508 NEWLINE or email us at [email protected] with a photo of your shower seal and your query. We hope you found this article helpful!
Love this article? Share it below!
Facebook
Twitter
LinkedIn
2 thoughts on “How To Choose the Right Shower Seal in 5 Steps”
Jan Morrison
the house we have bought has a Newline shower.. guessing it would be 20 years perhaps plus old,,,the house had an extention done in 1995.
We need to replace the door seals..we purchased Universal Seals but the seal on the opening side of the door does not stay closed is not allowing the door to stay closed..,, your advice please.
We live in Waimate.
Wow — 20 years is definitely a good run for a shower! Given its age, it’s likely that we no longer stock parts for that particular model.
You’re more than welcome to browse our Shower Parts Catalogue: https://shorturl.at/m01Pm to see if there’s a compatible seal or component that might work as a replacement.
If you’re unsure which seal might fit, feel free to send us a few clear photos of the shower and the seal profile, and we’ll do our best to point you in the right direction. Thanks!

2 thoughts on “How To Choose the Right Shower Seal in 5 Steps”
the house we have bought has a Newline shower.. guessing it would be 20 years perhaps plus old,,,the house had an extention done in 1995.
We need to replace the door seals..we purchased Universal Seals but the seal on the opening side of the door does not stay closed is not allowing the door to stay closed..,, your advice please.
We live in Waimate.
Thank you for reaching out to us!
Wow — 20 years is definitely a good run for a shower! Given its age, it’s likely that we no longer stock parts for that particular model.
You’re more than welcome to browse our Shower Parts Catalogue: https://shorturl.at/m01Pm to see if there’s a compatible seal or component that might work as a replacement.
If you’re unsure which seal might fit, feel free to send us a few clear photos of the shower and the seal profile, and we’ll do our best to point you in the right direction. Thanks!